Daily living · House & Home

Just 5 Kitchen Favorites

As I continue working through the Spring Cleaning of my kitchen, I thought I’d share some of my favorite items for keeping my kitchen tidy and organized. For most homes, I feel like the kitchen is the hub, and keeping it clean and functional is so important. I don’t think I really prioritized keeping a tidy kitchen until after I had both of my boys. The clutter started to really get to me, and I wanted things to just work better. I wanted tools and ingredients in places that made sense, I wanted to prevent paper clutter from taking over, and I really just wanted a spot that didn’t stress me out to be in… especially being a stay-at-home parent. Trial and error of different systems and products have brought me to my top 5 kitchen favorites:

Herb & Spice Rack

My spice rack with pull out shelves is one of my favorite kitchen purchases ever. I had a spice carousel thing before this, and while it worked fine, I had a lot of things in it that came with the set that I didn’t use, and it just sat on the countertop collecting dust and getting spattered with oil and sauces from cooking.

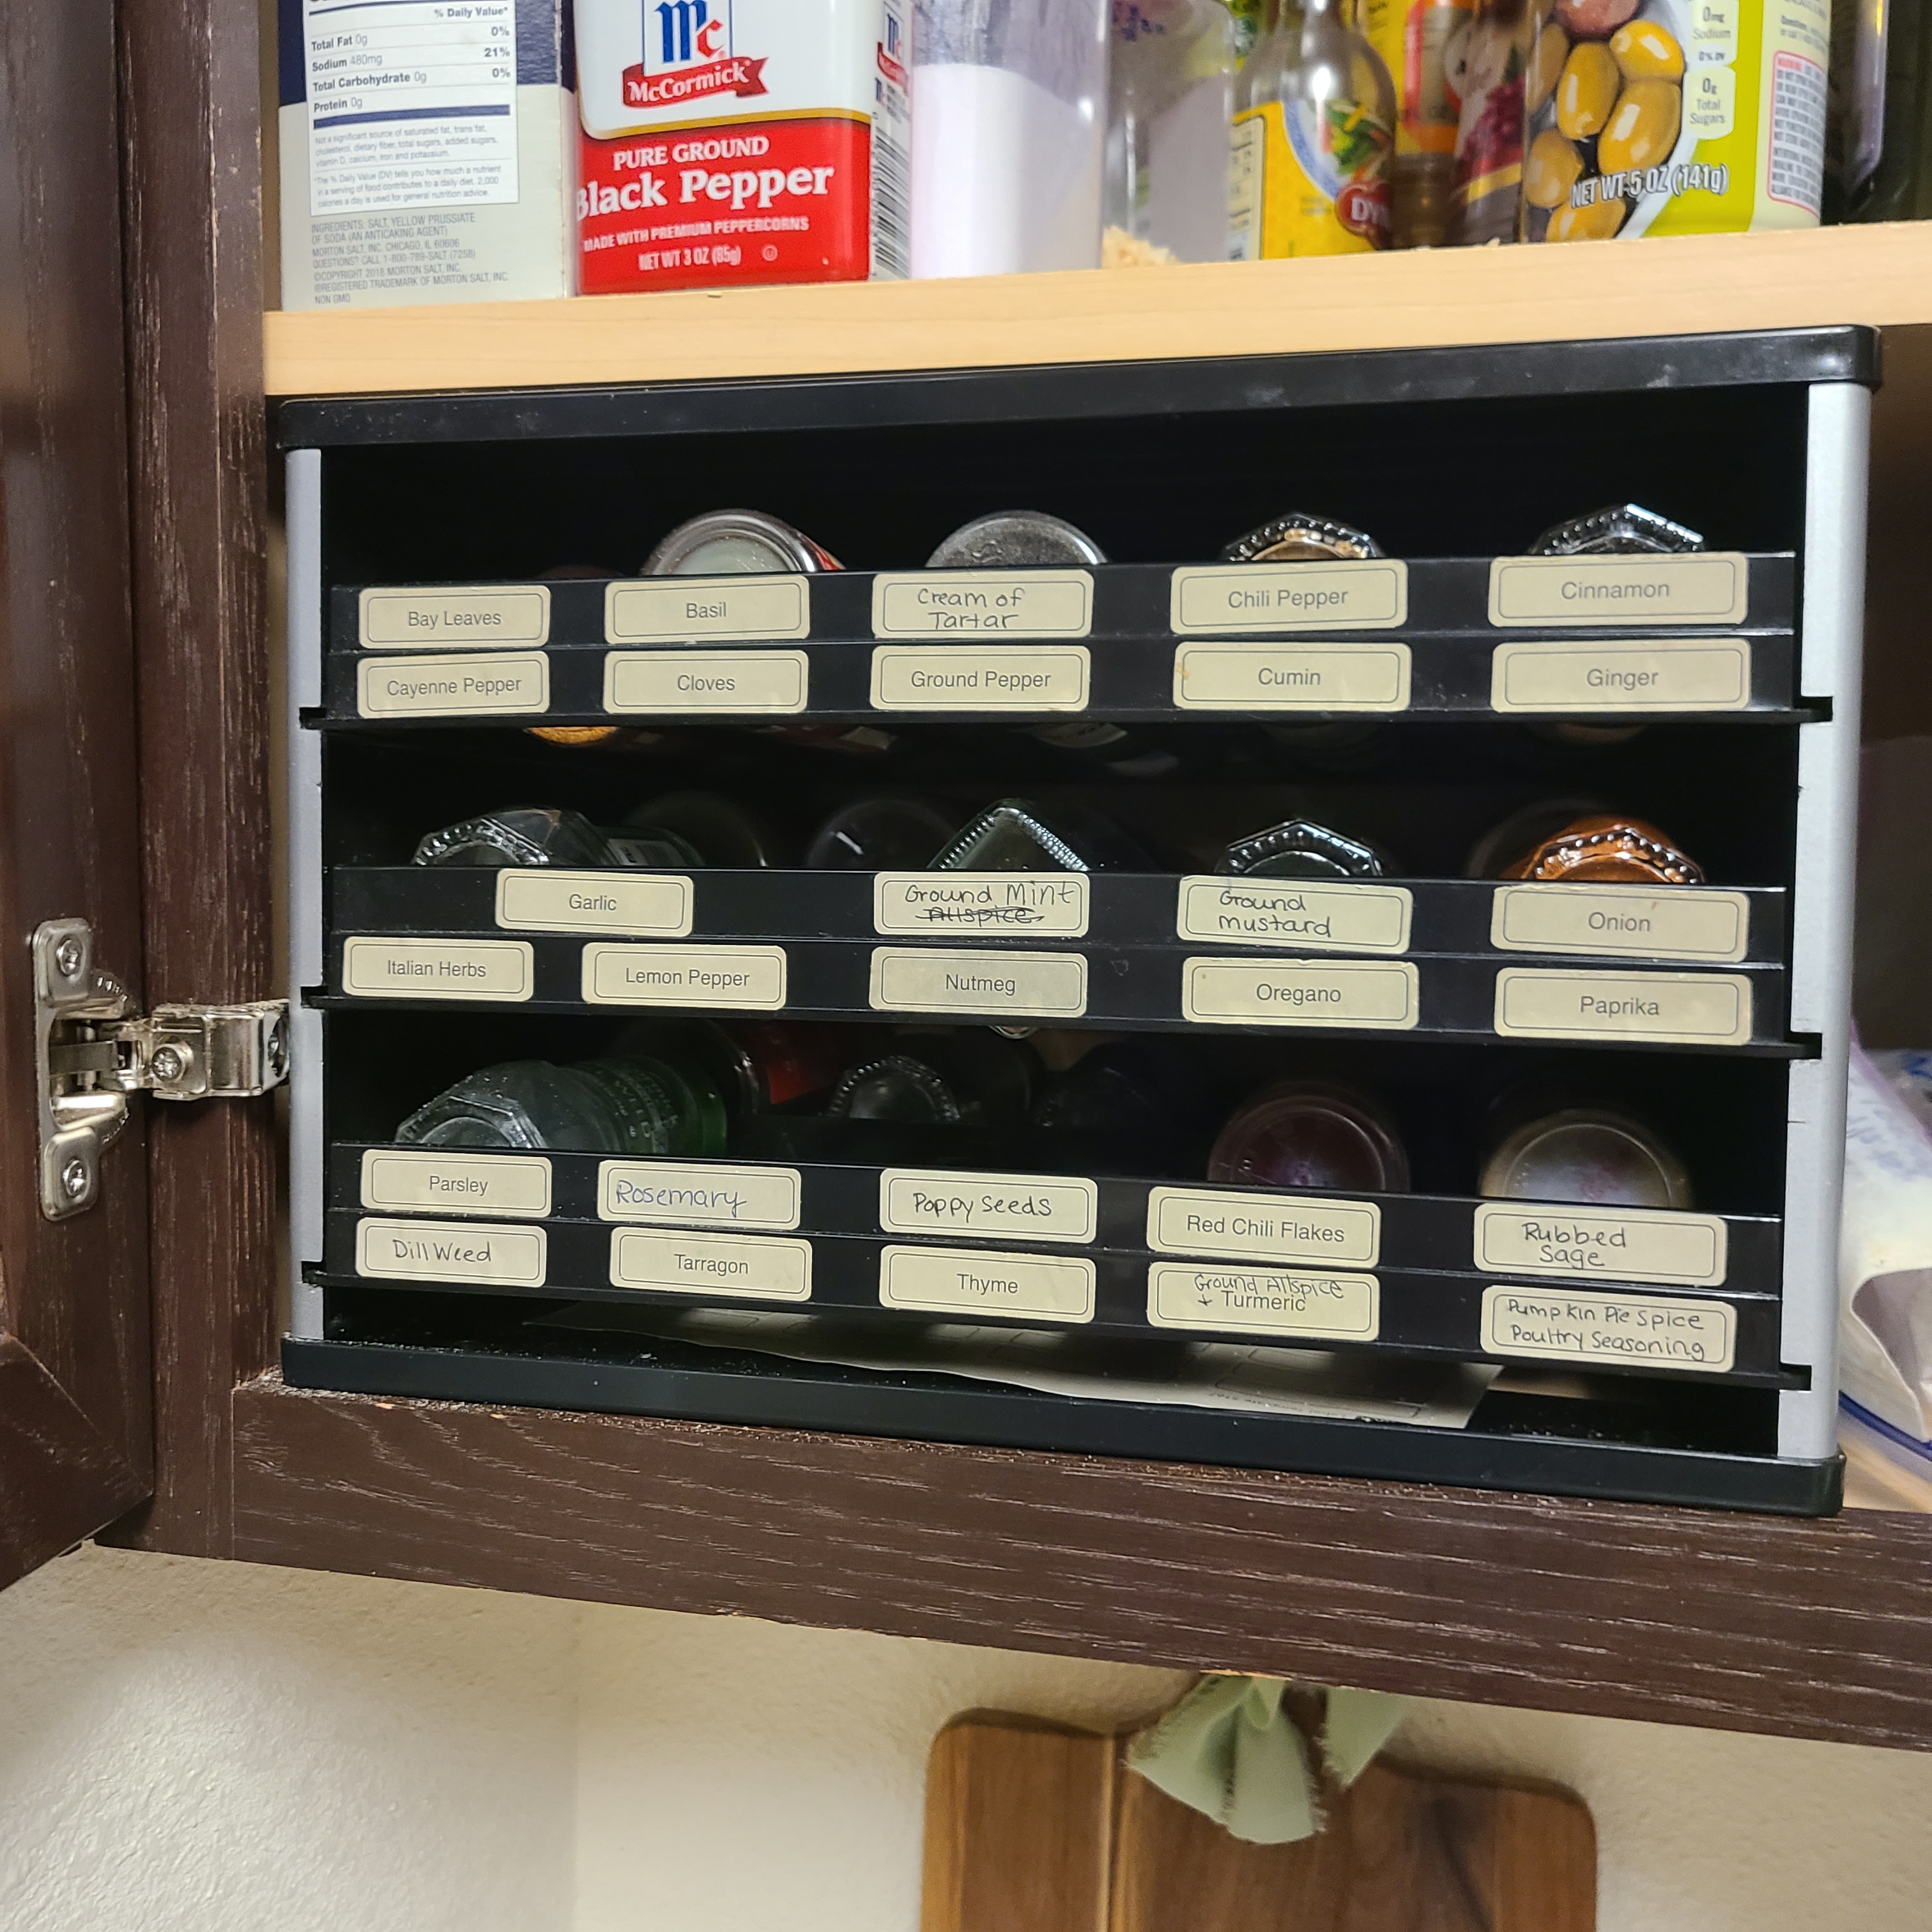
I think I switched to the SpiceStack when we lived in Texas, so I’ve had it for quite a few years now. The one in the photo below looks different from this one, but I believe it’s probably just an upgraded version.

Decanting and Uniformity

I try not to keep too much on my countertops, but some things do just stay out all the time. The best way I’ve found to minimize the clutter with these things is uniformity. I’ve switched everything to plain white containers to blend in with our white appliances and white walls.

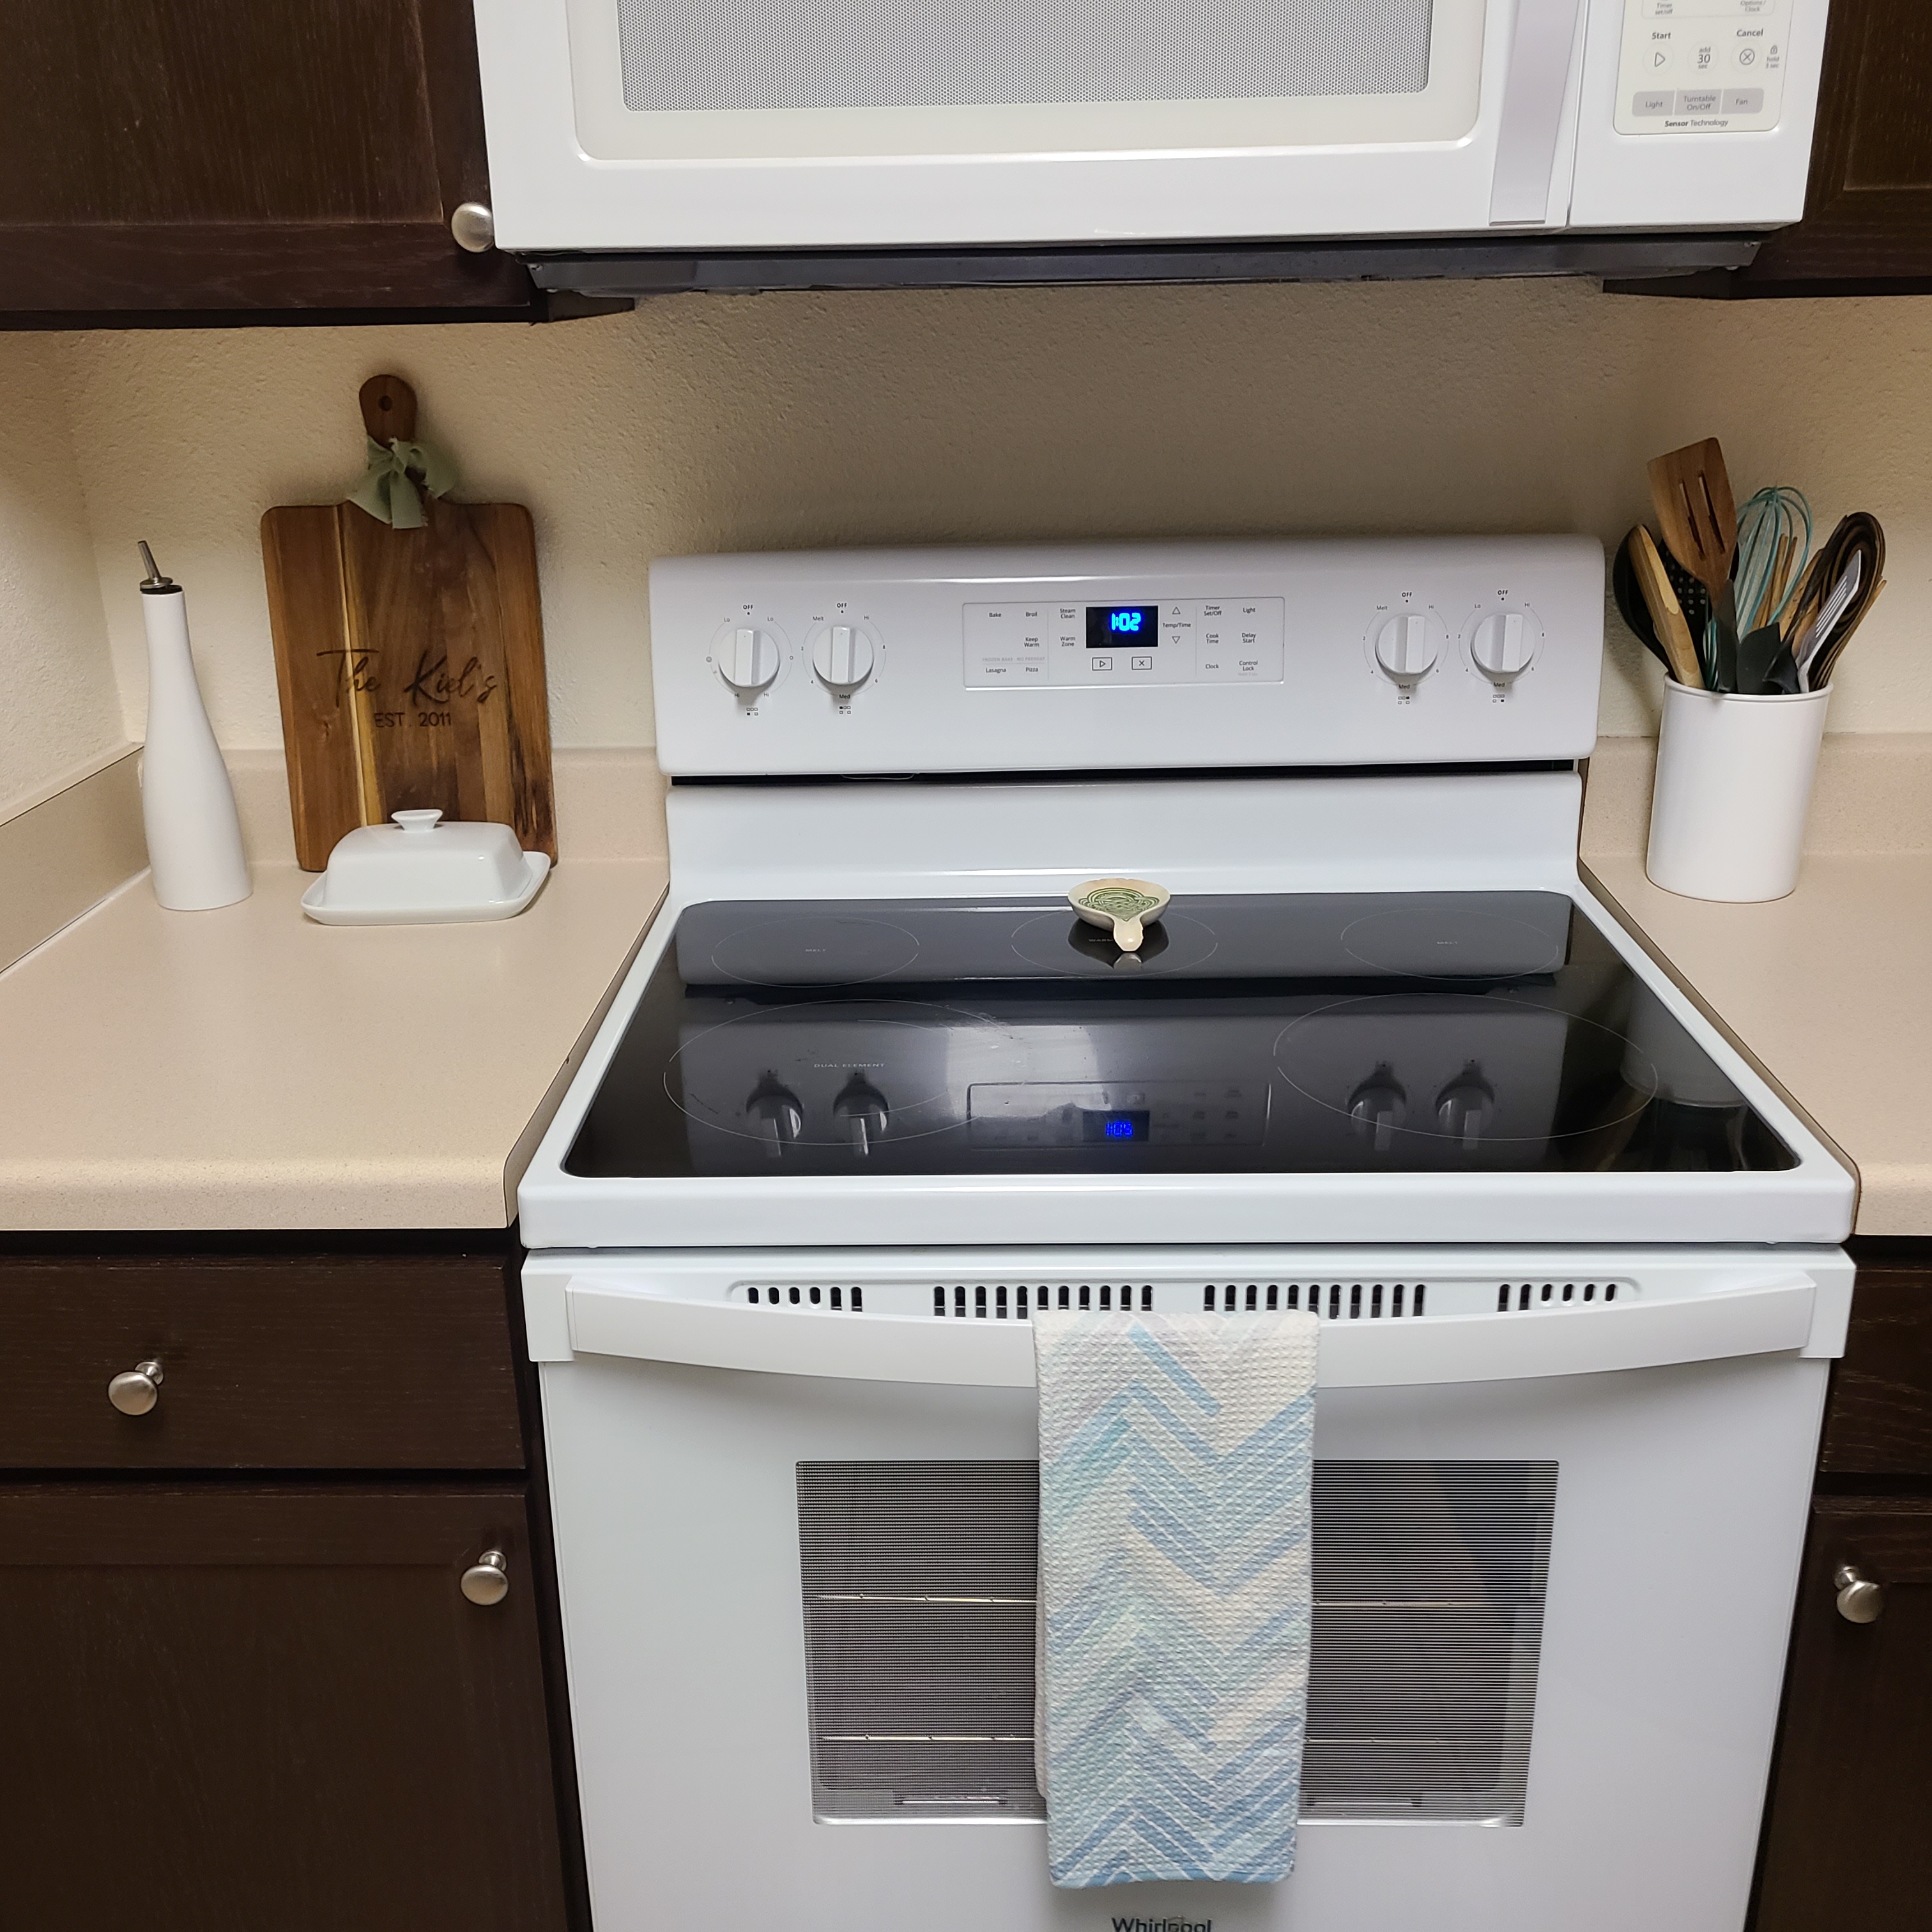
I decant my olive oil into a white cruet, my salted butter stays on the countertop in a white butter dish, and my cooking utensils are in a white canister. Besides blending in with their surroundings, another pro for white containers is that they all match even though they’re not made by the same companies.

In-Drawer Knife Block

We had a countertop knife block for many years, and it worked fine. What I didn’t like was that it took up space on the countertop, we didn’t even use all of the knives in it (they came as a set), and it was something else that got dusty and spattered during cooking. After contemplating it for quite awhile, I decided to try out an in-drawer knife block. This meant I had to do some decluttering so I had a drawer to use, but it has been 100% worth it! I love the extra space on the countertop, and I love having all of my knives in once place (we used to have knives that didn’t belong to the set in other drawers).

Roll-Up Dish Rack

I haven’t used a traditional dish drying rack in years, because they always seemed to get mildew-y and gross. I switched to a dish drying mat (which I still use) but I often felt like I didn’t have enough room for all of my hand-washed dishes, and some items didn’t dry all the way because of lack of air flow.

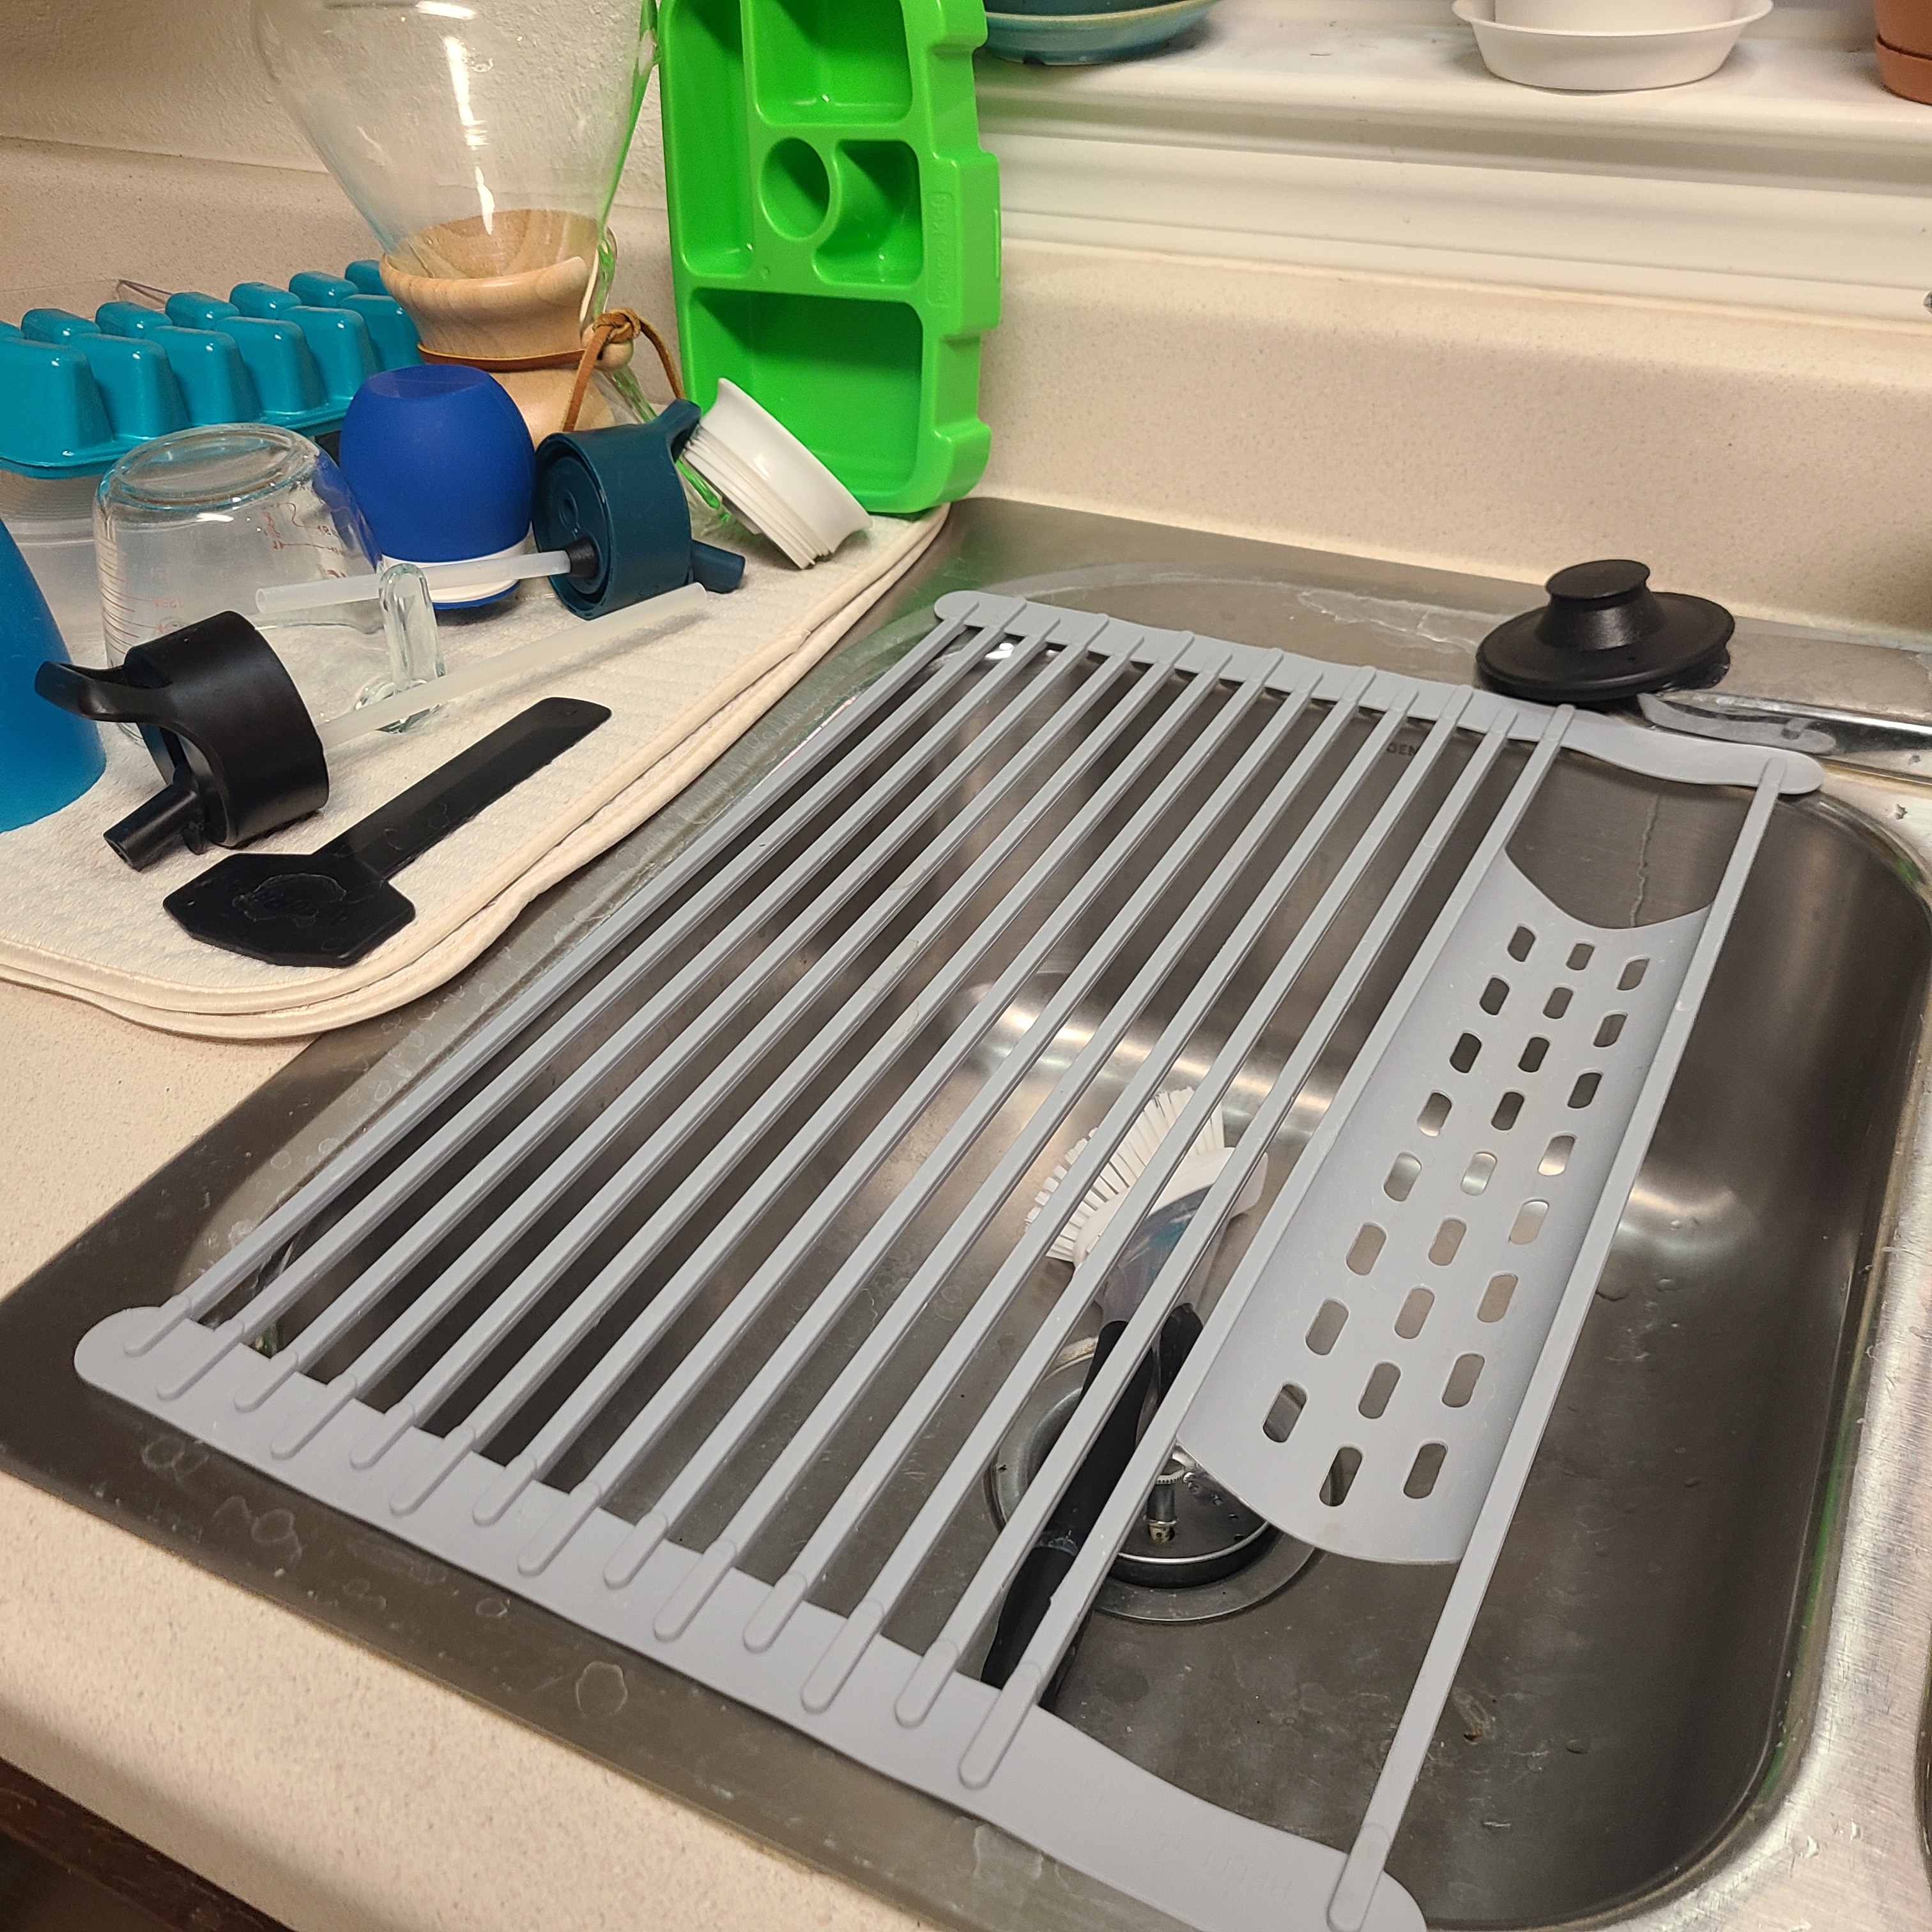
So I decided to try a roll-up dish rack that sits on the left side of my double sink. I love that this rolls up when I’m not using it, giving me access to the second sink when I need it, and I love that things can drip dry and get air circulation now (especially water bottles!).

Bag Holders

I used to have such an issue with plastic shopping bags and reusable shopping bags! At one point, I had a plastic bag filled with other plastic bags. Then I tried folding the plastic bags into triangles to store them more compactly, but that was time consuming and they still weren’t stored well. Finally I realized there are hanging bag holders!

I immediately got onto Etsy to order two of them: one for my plastic bags (I use them for bathroom trash cans and for food scraps when I’m chopping/peeling) and one for my reusable produce bags. I also switched to BagPodz instead of my collection of random reusable shopping bags. Now they’re all hanging out of the way in my pantry instead of collecting in a mess on the pantry floor. Also notice that I have not gotten to my pantry with Spring Cleaning haha… hoping to really overhaul it one of these weekends because it has gotten so unorganized!

If you have been struggling to love how your kitchen looks and works for you, hopefully one or more of these was a helpful suggestion. My kitchen still isn’t “perfect,” but it definitely brings me much more joy than it used to.

Daily living · House & Home

Just 5 Things to Clean in the Kitchen

I know it’s been quiet here! I promise I’ve been working on my Spring Cleaning, but I’ve been going a bit out of order (typical) and not being very consistent. We went on a little spring break trip (hoping to post on that soon!), Easter was a busy couple of weeks, and now we’re in the swing of baseball/t-ball season. I’m still working on my kitchen deep clean, but it’s been slow-moving as we get into another busy time of year.

Brace yourself, the kitchen may just be your biggest Spring Cleaning project. I personally like to tackle it pretty early on while I’m still feeling the most motivated. Just like the laundry room, you could turn this into a big thing (my list has 27 items), but I’m going to hit the 5 things I think will make the most impact:

Wipe down your cabinets

This first one is something you can do quickly or go super detailed with. If you’re just wanting to get this visually clean, take the time to wipe down all of your cabinet doors.

Wanting to do more? Do you have tops of your cabinets (not flush with the ceiling)? If you haven’t looked up there in awhile, get ready… it could be pretty gross. My cabinets near my stove are the worst because of the grease that builds up up there. My cabinets further away usually just need to be vacuumed to get rid of dust and some dead bugs.

Still going strong? Go through your cupboards one by one and look for things you can declutter. If you have any food items, check expiration dates and toss things you know you aren’t going to use. Is your mug collection getting out of control? See if you can pare down to just your favorites. Do you tend to hoard plastic containers for leftovers or meal prep? Again… see if you can pare down.

Clean Your Dishwasher

If you’re like me, you may have never realized that you have to clean something that cleans your things for you. In fact, the dishwasher in our current home is the first dishwasher I have ever cleaned. First of all, you need to clean your dishwasher filter(s). If you don’t know where yours is, find the make & model and Google it. Mine was on the bottom and just twists out. I filled my sink with hot soapy water and let it soak while I did the rest of the cleaning.

Next I found a filter on the door of my dishwasher. This was one gross: it had black moldy slime, and I was not excited to deal with it. But it honestly was a pretty quick job: I sprayed it with some kitchen cleaner, let it sit for a bit, then wiped it out. I even used a Q-tip to get in the nooks and crannies! After that, I wiped down the seal of the dishwasher. There was a lot of random food particles in there, and it was another pretty quick and easy job. Then I went back to my soaking filter. I used a cleaning toothbrush to give it a gentle scrub, rinsed it thoroughly, then twisted it back into place. Once all of that was done, I put a cup of vinegar on the top rack and ran a normal cycle. Lastly, wipe down the front of your dishwasher. Done!

Clean Your Stove/Oven

First of all, pull your oven out from the wall. If you haven’t done this in awhile, prepare for the worst. I do this twice a year now, but I didn’t used to! So it used to be really gross back there. Now it’s not too bad: usually a few stray dry pasta pieces, some dust, and maybe a dead bug. So it’s generally just a quick vacuum & mop of the floor. Next check out the sides of your oven. I usually have a few messy drips that have dried on, so I spray the with kitchen cleaner, wait a bit, then scrub off any dried on food/stains. Slide your oven back into place.

Now for the inside. You have options here: if your oven has a self-clean button, you can use that. My last oven had this option, and I used it once. If you remember your mom doing this when you were a kid, you may remember that this process can stink. Your oven will lock itself, heat itself as high as it can go, and burn off any food inside (which is why it can smell). This usually takes several hours. After it cools and unlocks, you can wipe out the ash left behind. Another option is the steam clean. This is what my current oven has (my last oven actually had this option as well). You will have to add some water, then let your oven use steam to loosen any tough stains or burnt on food inside. This is probably perfectly fine if you clean your oven often. If you don’t have either option (or you just like scrubbing!), you can wash your oven by hand. The best way to deal with tough spots by hand is with a baking soda and water paste. Whichever option you go with, make sure you wipe it out thoroughly.

After the inside is dealt with, just do a thorough wipe down of the outside of the door, the stovetop, and the knobs. Then you should be done!

Clean Your Refrigerator/Freezer

This is another appliance that is not too bad if you do it regularly (at least twice a year). Just like the oven, pull the fridge out so you can vacuum and mop under it. Before you push it back in, get a stool to check out the top of the refrigerator: you’ll probably have 1) clutter to toss or items to organize, and 2) a lot of dust to vacuum or wipe up. Then wipe down the sides of the fridge if it needs it. Push it back into place and get ready for the big job.

Time to empty out the freezer! Take everything out and see how the inside looks. Ours is usually pretty clean, so a quick wipe down is all it needs. Next you want to check out all the frozen food. Is anything really old or just not likely to be eaten? Toss it. Are you not even sure what that meat is? Toss it. Anything you want to keep, organize it as you put it back in.

You’re going to do the same thing with the refrigerator, although this will probably be a bit more time-consuming. Pull everything out and start at the top shelf and work your way down wiping out crumbs and scrubbing any spills or sticky spots. Pull drawers out to dump out crumbs and give a thorough wash with hot, soapy water. Clean up the shelves of your refrigerator door as well. Go through all your food, and check expiration dates. Toss anything that’s past its date, moldy, or just not being eaten. As you put things back in, try to organize by category. If you have clear bins sitting around, these can be really helpful for corralling like items!

After the inside is clean, wipe down the front of your refrigerator (toss any old coupons, photos, reminders, lists, etc). After this, your fridge should be sparkling!

Clean Out Your Pantry or Food Storage

Cleaning out your food storage space will probably be pretty similar to cleaning out the refrigerator. Empty your pantry or cupboards, then wipe everything down and vacuum the floor. Then it’s time to declutter and purge: toss expired foods, throw out stale items, and relocate anything that doesn’t belong. Organize things as you put them back in (baskets and bins are really helpful here again!).

Once you’ve tackled your big appliances and food storage areas, your kitchen should be feeling and looking a lot cleaner. These are things that really need to be done regularly to prevent gross messes, keep on top of your inventory of food and kitchen items, and keep your appliances in their best condition. I personally feel like having the kitchen super clean and tidy makes the whole house feel cleaner!

Daily living · House & Home

Just 5 Things to Clean in the Laundry Room

I took a few weeks off of blogging to take my very first solo trip since having kids plus a week to get back into the swing of things. I meant to get something posted last Friday, but both kids had dress up weeks at school, and my extra time went to that instead.

But here we are in March! I don’t know what this time of year looks like in your area, but here we are getting tons of windy days. When it’s not windy though, we have sunny days with highs in the 60s and 70s, and my spring bulbs are popping up in my front garden. I definitely feel a burst of energy as winter starts to give way to new life and more green outside. With some extra motivation, I wholeheartedly jump into Spring Cleaning.

In the past, I’ve tackled Spring Cleaning full force: my normal cleaning routine falls to the back burner as I tackle a room a day for some deep cleaning. Unfortunately, I end up burning out with this method. I think I’ve only completed Spring Cleaning in the whole house one spring. So this year I’m sticking with my usual weekly cleaning schedule and just adding a task or two a day of deep cleaning. That means Spring Cleaning is probably going to last most of the spring season, not just two weeks. But each week, I’m going to highlight just one room in case you want to try some Spring Cleaning too!

No matter what kind of laundry room/closet/space you have, there are probably some tasks you should be doing at least once a year to keep everything clean and working well. Now, don’t get me wrong, I wanted to find a way to condense everything I’d want to get done in just 5 things, but then I thought that was kind of cheating… so I really am just going to hit 5 things you can Spring Clean in the laundry room (with additional tasks if you’re going all out this spring!):

Declutter

Spring is a great time of year to go through anything you store in your laundry area. For me, I have baskets on a shelf that hold vacuum cleaner tools, extra light bulbs, paper products like tissues and toilet paper, and various laundry supplies. I honestly didn’t have much to declutter, but I did take the time to look through everything and straighten things up.

Clean your machines

Okay, so I’m leaving this up to you: take “clean your machines” however detailed (or not detailed) as you’d like. At a minimum, I’d recommend wiping down the visible parts of your machines. Feeling more ambitious? Look for the dirtiest/grossest part of your machine, and tackle that. If I had to guess… it will be lint build up somewhere in the dryer and either a gunky gasket in your front loading washing machine or detergent build up somewhere in your washer.

Want to go all out? Read on, my friend…

This one may take some muscle, depending on where your washing machine and dryer are located. I had to pull out one machine at a time to get to the floor space behind and underneath them. Then I took a brush attachment on my vacuum cleaner to vacuum down the backs of the machines, a microfiber cloth to wipe down the hoses, hook-ups, and baseboards, and ended with vacuuming and mopping the floor back there. It gets pretty dusty back there, and keeping on top of it makes it a quick job.

Once you get your machines pushed back to where they normally sit, put away anything that is sitting on top of them, then wipe the tops and panels down. This is probably another quick job unless you have detergent drips to scrub or a lot of things to put away.

Next up is the inside of the washing machine. This was pretty quick for me, but only because Andrew had recently fully cleaned the detergent dispenser area of our washing machine. Normally it gets kind of gross with detergent residue and spots of mold or mildew. You may also need to wash down the drum. I run a self-clean cycle once a month on my washing machine, so the inside was pretty clean. I did have to do some scrubbing on the door, but it wasn’t too bad. The grossest thing you may have to clean (if you have a front-loading washing machine) is the big rubber gasket where the door closes. Ours stays pretty clean with the self-clean cycle plus leaving the door open to dry out after a load of laundry, but in the past it has gotten slimy and gross. You can tackle a grimy gasket with white vinegar and some dish soap followed by a thorough rinse with a wet cloth and letting it air dry.

Cleaning the dryer should be a quicker job. You can wipe down the drum with a damp cloth with a bit of dish soap, but you’ll probably mostly be looking to clear built up lint on areas like the door and the lint trap area. I did my best to vacuum out the area the lint trap slides into, but I did most of my cleaning with a dry microfiber cloth in nooks and crannies.

Cleaning your baskets

Whatever way you store or sort your laundry (baskets, bins, bags), there’s a good chance that they need a wipe down. My clothes baskets in the laundry room tend to accumulate crumbs, dust, and dirt, so I wiped them out and got the dirt out of creases and crannies.

Baseboards, door frames, etc.

I think the baseboards in my laundry room not blocked by the laundry machines were dustier than the rest of the room. I like to use a brush attachment to suck up as much dust as I can first, then I wipe them down with a cloth sprayed with a multipurpose cleaner. This is a great time to get rid of the dust on the door frames, wipe down the doors (especially if they have any decorative features), and sanitize your doorknobs and light switches.

Vacuum & mop

Hopefully you already vacuumed and mopped the area where your laundry machines sit, so you should just have to vacuum and mop any remaining floor space. For me, I mostly had to vacuum up all the dust I wiped off of other areas!

After doing these five tasks, your laundry room should be dust-free and sparkling clean! I definitely could have done this in one day, but I chose to spread it out over the first week of March in chunks of free time I found. Whatever way you choose to do it, I hope you have a successful first wave of Spring Cleaning!